







Search Results for: pouring point
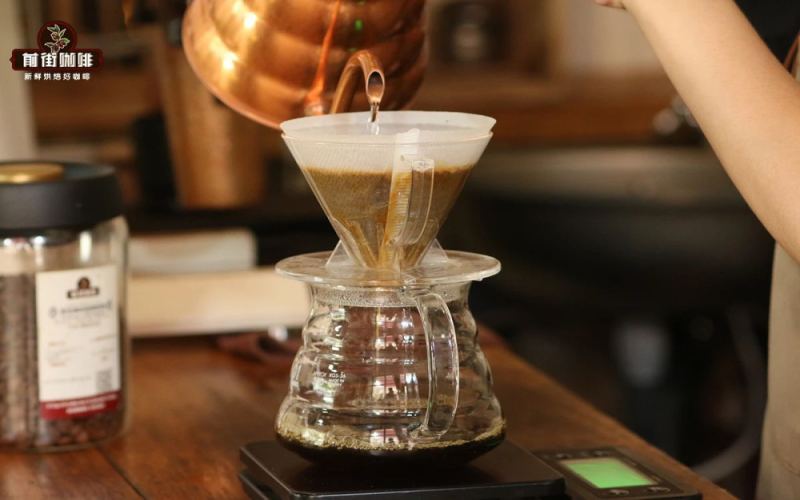
A Detailed Guide to Pour-Over Coffee Pouring Methods: The Differences Between Circular and Center-Point Pouring and Practical Key Points
Pour-over coffee pouring techniques have always been one of the topics newbies care about most. Many friends who have just discovered Front Street Coffee often ask: why doesn't the coffee I brew taste good enough? In fact, understanding and applying the right brewing parameters is more important than obsessing over pouring techniques. This article compares two methods—circular pouring and single-point pouring—analyzes how the coffee bed changes, why turbulence occurs, and how stirring intensity affects extraction, while also answering common questions about pouring height and the direction of circular pouring. This set of pouring key points that Front Street Coffee has put together for beginners starts with slow, steady, and straight, helping you avoid channeling and brew an even, delicious pour-over coffee. [more…]
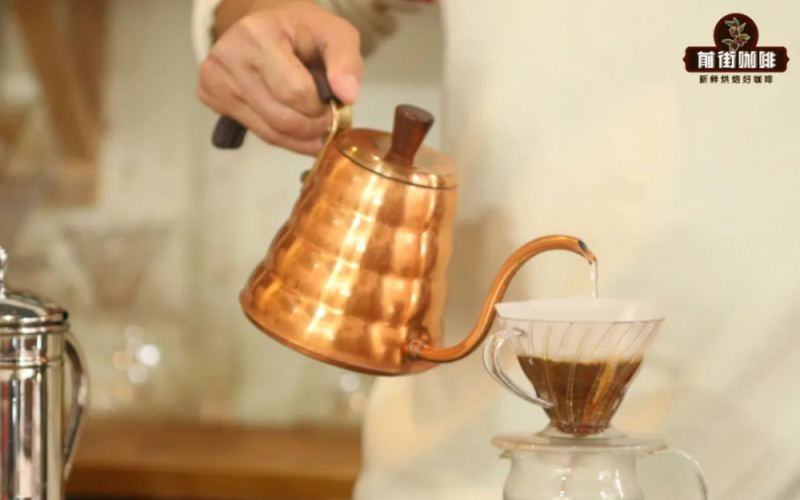
How to Master the Timing of Pulsed Pouring in Pour-Over Coffee? A Detailed Guide to the Water Volume and Time Nodes of the Three-Pour Method
Segmented pouring is a common yet difficult-to-master method in pour-over coffee, with the challenge lying in judging when to stop pouring and when to pour again. This article uses Front Street Coffee's three-stage brewing as an example to explain in detail the techniques for judging pouring checkpoints. The article points out that you should not wait for the water to finish flowing before pouring again; subsequent pours should bring the coffee bed height to exactly the same level as the previous stage to ensure even extraction. Using 15g of coffee grounds as an example, the first stage is blooming, pouring 30ml of water and waiting 30 seconds; the second stage pours water to 1/2 of the short rib, with a reference water amount of 120ml, taking about 55 seconds to 1 minute; the third stage involves observing the water level dropping, and when it falls to 1/2 between the coffee bed and the filter wall, pour 90ml, with a reference time of 1 minute 10 seconds to 1 minute 15 seconds; pouring ends at about 1 minute 30 seconds to 1 minute 35 seconds, and the coffee liquid finishes flowing at about 2 minutes to 2 minutes 10 seconds. The logic for four-stage pouring is the same. [more…]

Latte Art Guide: From Pouring Point and Swirling Control to Step-by-Step Tutorials for Tulip and Leaf Patterns
Latte art encompasses three categories: free pouring, etching, and printing. Of these, free pouring and etching are together known as milk latte art—free pouring creates the pattern directly through wrist control while pouring hot milk, whereas etching uses chocolate sauce and tools such as toothpicks and bar spoons to refine the details. Free pouring is the foundation, and etching is the辅助 (auxiliary); the former tests technique, the latter tests creativity. To master milk latte art, one typically goes through five stages: choosing the right milk pitcher and coffee cup, practicing flow control, becoming familiar with basic patterns, hands-on practice, and then further refinement and improvement. This article will use two basic patterns, the tulip and the leaf, as examples to break down key techniques such as the position of the pour point, the flow rate, and the rhythm of the swing, and explain how to use 【Front Street Specialty Blend】 to extract espresso suitable for latte art. [more…]
Coffee Latte Art Tutorial: Pouring Point and Swirling Techniques for Tulip and Leaf Patterns, and a Learning Path
Latte art is a visual art created by the collision of milk and espresso, mainly divided into two forms: free pouring and etching, where free pouring tests technique and etching tests creativity. This article systematically outlines the five steps to learning milk latte art, from choosing equipment and extracting espresso to steaming milk foam, and then to flow control and pattern practice, gradually guiding you through the basics. It focuses on explaining the injection point selection, flow control, and swinging rhythm for two basic patterns—the tulip and the leaf—and recommends using Front Street Coffee's specialty blend to make espresso, allowing the nutty caramel flavor to better blend with the milk's sweetness. Whether you are a coffee enthusiast just starting out or a barista looking to refine your skills, you can find practical practice methods here. [more…]

Latte Art Beginner's Illustrated Tutorial: Detailed Step-by-Step Analysis from Principles to Techniques and a Guide to Choosing Milk Foam
Want to learn latte art but don't know where to start? This article uses illustrations to break down the core principles and practical techniques of latte art, from integrating milk foam with coffee to controlling the landing point when pouring the design, helping you build muscle memory step by step. It also answers the common question of "what milk to use for latte art" and recommends espresso bean recipes suitable for latte art. Drawing on years of experience, Front Street Coffee tells you that learning a basic pattern usually takes 4 days: the first day to understand the principles, the second day to practice hands-on, the third day to review the key points, and the fourth day to consolidate and improve. As long as the milk foam quality is up to standard, pouring a beautiful pattern is not difficult. The article also shares the landing-point patterns for basic designs like hearts and leaves, as well as practice suggestions for using real milk and real coffee to get a feel for it. [more…]

Beginner Latte Art Lesson 1: A Detailed Guide to Milk Foam Thickness, Pouring Integration, and Finishing Techniques for the Large Heart Pattern
If you want to learn latte art, the large heart is the most suitable first pattern for beginners, and it is also the foundation for many complex patterns that follow. In this tutorial brought to you by Front Street Coffee, we break down the key points of making a large heart one by one, from the standards for steaming milk foam and controlling the amount of blending, to choosing the pouring point and the finishing technique. The article also includes images of common failure cases and analysis of their causes to help beginners quickly identify problems. Whether you are just starting out with latte art or always fall short at the finishing stage, this content will give you clear guidance. [more…]
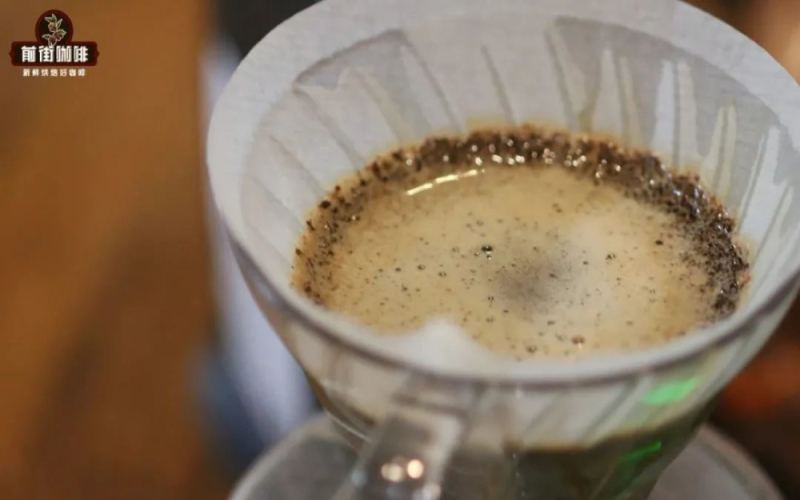
Three key time points for judging whether water accumulation will occur during the pour-over brewing process
One of the most frustrating problems in pour-over coffee is water pooling. Once clogging occurs in the final stage of brewing, the coffee's flavor often turns bitter and undrinkable. In fact, before the pouring is finished, there are several time windows where you can predict in advance whether pooling will happen. As long as you master these judgment methods, you can adjust your pouring strategy in time and avoid ending up in a passive position. This article will focus on three key time points—the degree of bloom expansion, the foam performance during pouring after the bloom, and the speed at which the water level drops before the final pour—to explain one by one how to identify the risk of pooling and give corresponding countermeasures. It will also introduce the ultimate solution when all methods fail—flow cutoff—and how to deal with the problems of overly high coffee concentration and missing flavor after flow cutoff. [more…]
Latte Art Basics Tutorial: Step-by-Step Guide to Making a Large Heart Pattern and Detailed Explanation of Common Mistakes
Want to learn latte art but don't know where to start? In this issue, Front Street Coffee brings you a tutorial on the most basic and classic pattern: the large heart. The large heart is the first pattern that most beginners successfully pour, and it is also the foundation for many complex designs. Mastering it requires first getting through several fundamentals: espresso extraction, milk frothing, pitcher holding, and integration. This article will break down in detail the milk foam thickness, the amount of integration, the choice of pouring point, the milk-pouring technique, and the finishing touches, and will also include multiple photos of failed cases with cause analysis to help coffee lovers avoid detours and pour a beautiful, centered, full heart. [more…]
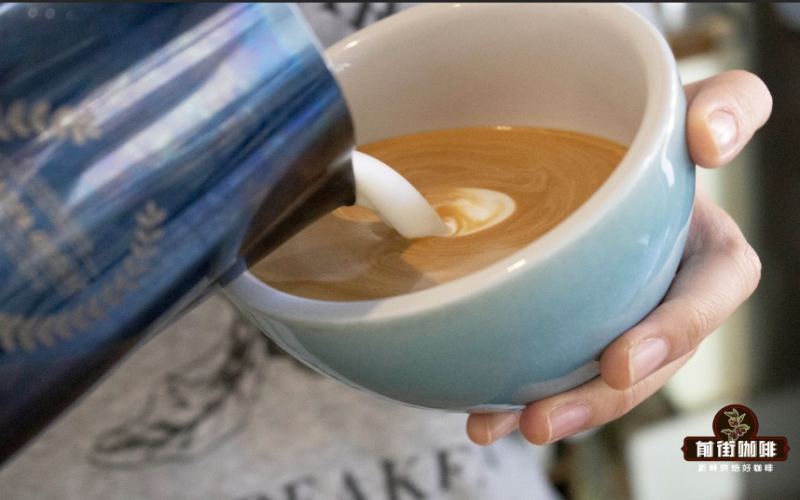
Latte Art Composition Techniques: Three Major Causes and Solutions for Off-Center Patterns
In coffee latte art, the beauty of a pattern depends not only on smooth lines but also on whether the composition is reasonable. Centered composition is the most common approach, as it highlights the sense of stability of symmetrical patterns. However, many beginners find that their latte art patterns always deviate from the center. Front Street Coffee points out that this is mainly caused by three reasons: milk foam that is too thin leading to excessive fluidity, pouring back into the cup too quickly increasing the impact force, and an incorrect drop point. This article will analyze the causes of and solutions to these problems one by one, while also emphasizing the importance of choosing suitable coffee beans, and recommending two products, Front Street Classic Blend and Commercial Blend, to help you create centered and beautiful latte art at home. [more…]
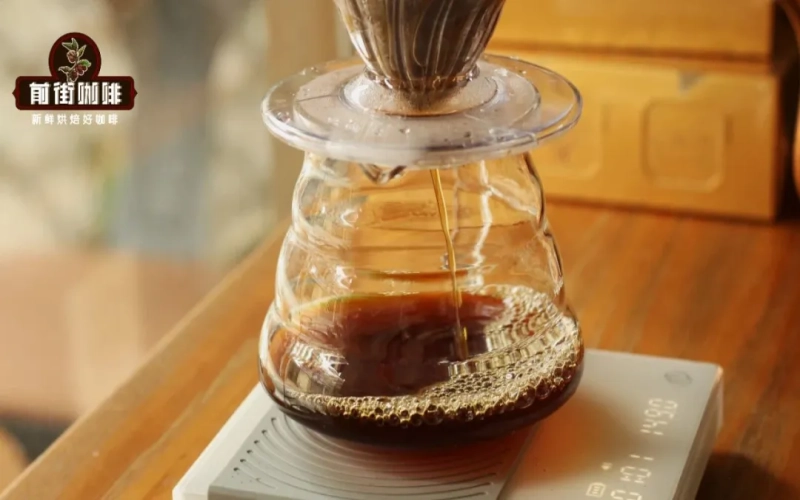
The Complete Guide to Pour-Over Coffee Water Pouring: Analyzing the Core Techniques of Position, Path, Height, and Flow Rate
Many coffee enthusiasts who practice pour-over at home often struggle with inconsistent flavor even when their parameters match those used in cafés. The root cause usually lies in the water stream not being stable enough during pouring. In fact, the position, path, height, and size of the pour all directly affect the extraction. SCA experimental data shows that the higher the stability of the water stream, the higher the extraction uniformity. This article draws on the hands-on experience of Front Street cafés to systematically explain how to stabilize the brewing of a delicious pour-over coffee through precise control of pouring. Whether you are a beginner or an advanced player, mastering these pouring essentials can take your coffee quality to the next level. [more…]

Latte art milk frothing and pouring techniques: a complete approach from basic practice to on-the-spot adaptation
Latte art is something that sounds simple but often leaves people scratching their heads in practice. Many beginners can occasionally pour a beautiful pattern, but when they try to reproduce it, they just can't find that same touch again. Front Street believes that judging whether a latte art pour is up to standard starts with the fineness of the surface milk foam, then whether the integration is even and the boundary between the golden ring and the pattern is clear, and only lastly comes the pattern itself—clear texture and well-defined shape are enough; complexity is not the point. Theory cannot replace feel, but there are some practical tips that can effectively reduce the failure rate. This article will share a few lessons Front Street has summarized through hands-on practice, covering adjustments to milk foam thickness, pre-treatment before integration, repeated refinement of basic patterns, and flexible remedies during pouring, in hopes of helping coffee enthusiasts pour latte art more consistently in their daily output. [more…]

Simple Latte Art Illustrated Guide | What is the principle behind coffee latte art? Which kind of milk is used to make latte art? Is it hard for coffee beginners to learn latte art?
Many people ask Front Street, how long does it take to learn latte art? If we're just talking about producing a good-looking pattern, with a bit of luck it only takes one day. If we're talking about truly mastering a pattern, it takes at least 4 days. So many people ask, where do these 4 days come from? It's simple: Day one, read this article from Front Street; day two, practice; day three, [more…]

From Heart to Swan: An Advanced Coffee Latte Art Tutorial, Mastering the Shaping Techniques of Multi-Layer Heart, Rosetta, and Tulip
Want to make coffee-shop-quality latte art at home? This tutorial will take you from the basics to advanced techniques. The article first emphasizes the importance of steaming milk, and points out that integration is the key step that determines whether the milk coffee has an even texture. Then, we break down the specific techniques for five classic patterns—heart, layered heart, rosetta, tulip, and swan. From choosing the pour point and controlling the flow to the timing of bringing the cup back and the finishing motion, every step is explained in detail. Whether you are a complete beginner or an advanced player looking to break through a plateau, you will find practical tips and practice directions here. [more…]

How can you make latte art integration cleaner? Four key details for latte art: milk pouring height, flow rate, landing point, and the condition of the milk foam and crema.
Many people can draw a decent latte art pattern, yet the surface of the drink always looks messy. The problem usually lies in the mixing step. Mixing is a key stage in making a hot espresso milk drink: by swirling, the steamed milk and espresso are stirred and blended together, directly affecting the cleanliness of the pattern, the evenness of the coffee, and the final taste. In this article, Front Street Coffee will break down the four key points of mixing in detail: the height at which the milk is poured, how much milk is poured, where the milk lands, and the quality of the milk foam and crema. Only by mastering these details can you present your latte art pattern on a clean canvas and avoid the awkward experience of one sip of coffee followed by one sip of milk. [more…]
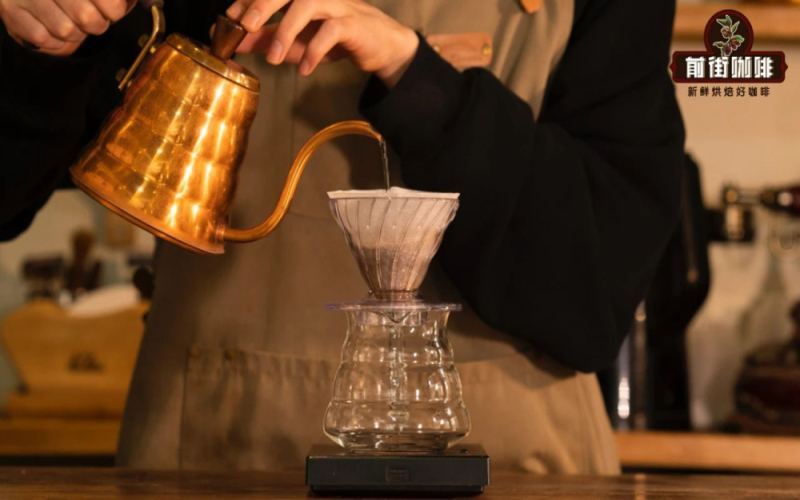
How to Make Japanese-Style Iced Pour-Over Coffee? A Full Breakdown of Its Characteristics, Steps, and Brewing Key Points
Japanese coffee culture has long been known for its artisan spirit, and local coffee lovers prefer rich, full-bodied dark roasts—Blue Mountain and Mandheling are typical examples. But on a hot summer day, a refreshing glass of iced coffee is equally indispensable. The Japanese-style iced coffee method is actually not complicated—prepare ice cubes in the cup, then extract using the regular hot pour-over method. Its biggest advantage is that it's quick to make, with no need to wait all night like cold brew, yet the result is full-flavored and bright. This article will use a recipe of 15g coffee grounds and 100g ice as an example, explaining the complete Japanese-style iced pour-over process step by step—from bean selection, grind size, and water temperature to staged pouring—and summarize key points such as the ice-to-water ratio and extraction yield adjustment, to help you brew a refreshing and delicious cup at home. [more…]
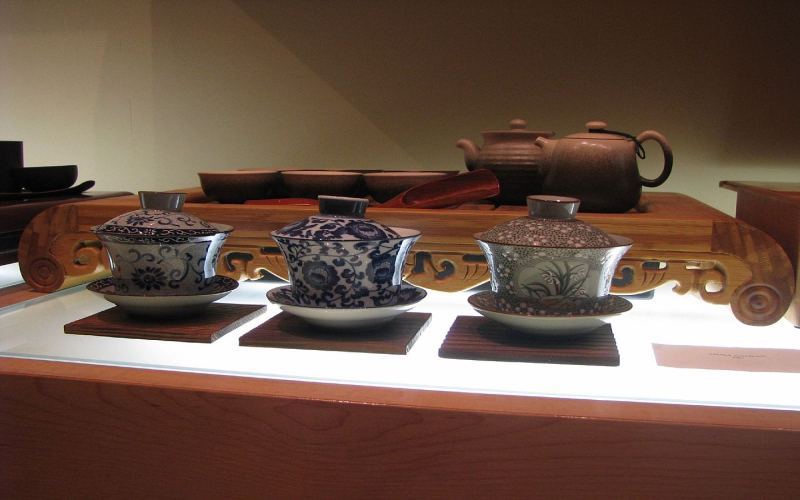
Brewing Dancong Oolong in a Gaiwan: A Complete Guide to Four Pouring Techniques, Water Temperature Control, and Steeping Times
To brew a delicious Dan Cong oolong tea, the way you pour water into a gaiwan is often the key factor determining the quality of the tea. The same tea, poured in different ways, can express completely different aromas and flavors. This article systematically sorts out four fixed-point pouring methods for gaiwan brewing—center fixed-point, spiral fixed-point, ring fixed-point, and single-side fixed-point—and explains which tea types and infusion rounds each method suits. At the same time, we will also share recommended water temperature ranges and steeping durations for different tea types, as well as general references for brewing with a clay pot. Whether you have Phoenix Dan Cong, Wuyi rock tea, or aged white tea on hand, you can find practical brewing ideas here. Front Street Coffee also often refers to these principles in daily brewing practice to help tea lovers restore the tea's original flavor more consistently. [more…]
An Analysis of the Seven Major Pour-Over Coffee Schools: A Full Comparison of Brewing Techniques Including the One-Pour and Three-Pour Methods
The charm of pour-over coffee lies not only in the flavor itself, but also in the ever-changing brewing techniques. In coffee enthusiast circles, there are seven major brewing schools: volcano pour, meteor pour, one-cut pour, three-cut pour, tamped pour, stirring method, and drip pour. Except for the drip pour, all the other methods use circular pouring. Each school has its own unique extraction logic and flavor orientation—some pursue layering, some emphasize sweetness, and some are better suited for enthusiasts to explore. This article breaks down the key operational points, pros and cons, and suitable scenarios for each method one by one, and includes practical advice from Front Street Coffee to help you find the style that suits you best in your daily brewing. [more…]
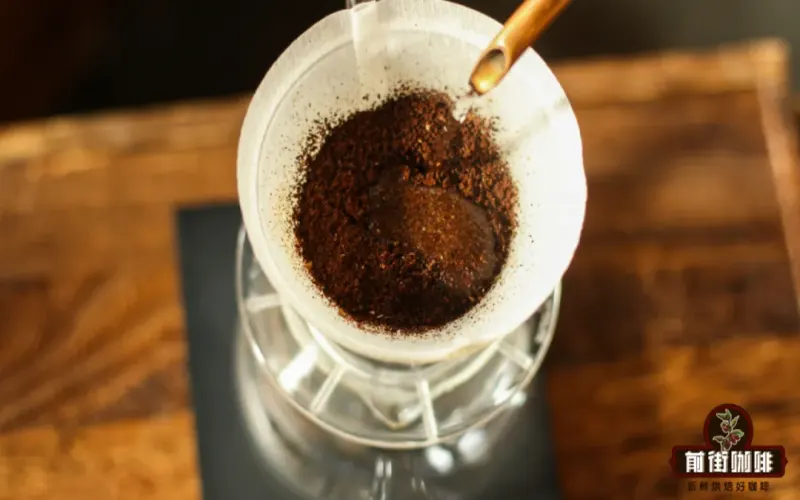
A Complete Analysis of Pour-Over Coffee Pouring Methods: The Practical Impact of Stages, Height, and Circular vs. Center Pouring on Extraction Yield
The biggest difference between pour-over coffee and other extraction methods is that the entire brewing process relies on manual pouring. Pouring water serves both to create turbulence and speed up the dissolution of flavor compounds, and to allow coffee grounds in different positions to be extracted relatively evenly. Precisely because it depends on human operation, any subtle change during the pouring stage can directly affect the final extraction yield. Front Street often says that about 30% of the substances in coffee beans are soluble, but not all of them need to be extracted. According to the Golden Cup extraction theory, 18%–22% is the extraction yield range generally accepted by most people. To stay reliably within this range, in addition to choosing parameters with a high margin for error, understanding the principles behind pouring is equally crucial. From Front Street's perspective, this article focuses on three variables—staged pouring, pouring height, and circling versus stationary pouring—and breaks down how they affect the extraction yield, helping you understand why you should pour this way and how to adjust. [more…]

Latte Art Tutorial: Operational Differences Between Leaf Patterns and Layered Hearts, and a Detailed Guide to Creating Latte Art
After mastering the basic heart and the more advanced multi-layered heart, the leaf pattern is another hurdle to overcome in latte art practice. It may look similar to the multi-layered heart, but in reality there are clear differences in milk foam condition, the amount of integration, the pour point, and the swinging method. This article will break down the key points of making leaf latte art one by one, from milk foam thickness, the amount of milk used for integration, the pour point for creating the pattern, and swinging techniques to the complete hands-on steps. It will also explain the impact of different pitcher capacities on the process, and how to find the right position for creating the design by adjusting the amount of integration. Front Street Coffee suggests first practicing repeatedly with dish soap and soy sauce, and once the technique is proficient, then using milk and espresso for real practice, so you can pour a leaf pattern with clear stripes and a beautiful finish. [more…]

How Thick Should the Milk Foam Be for a Standard Cappuccino? Uncovering the Milk Foam Differences Between Cappuccino and Latte and Key Production Points
Many people cannot distinguish a cappuccino from a latte, especially nowadays when latte art is so popular that the two seem to look more and more alike. In fact, from the thickness of the milk foam to the logic of preparation, there is a clear dividing line between them. A cappuccino emphasizes preserving a ring of brown "coffee golden ring," and the milk foam needs to be whipped to about 1.5 cm thick to support a "hat" shape rising above the rim of the cup, which is why it is not suitable for latte art. A latte's milk foam, by contrast, is only about 1 cm thick and highly fluid, making it easy to blend and draw with. Starting from Front Street Coffee's production experience, this article sorts out the historical origins of the cappuccino, the standard for milk foam thickness, and the core differences from a latte, and gives complete operating steps from choosing a cup, extraction, and steaming milk to pouring, helping you make a qualified cup of cappuccino. [more…]